Here’s my crochet project notes for adapting two free patterns found online to crochet a sweet octopus character with a daisy hat.
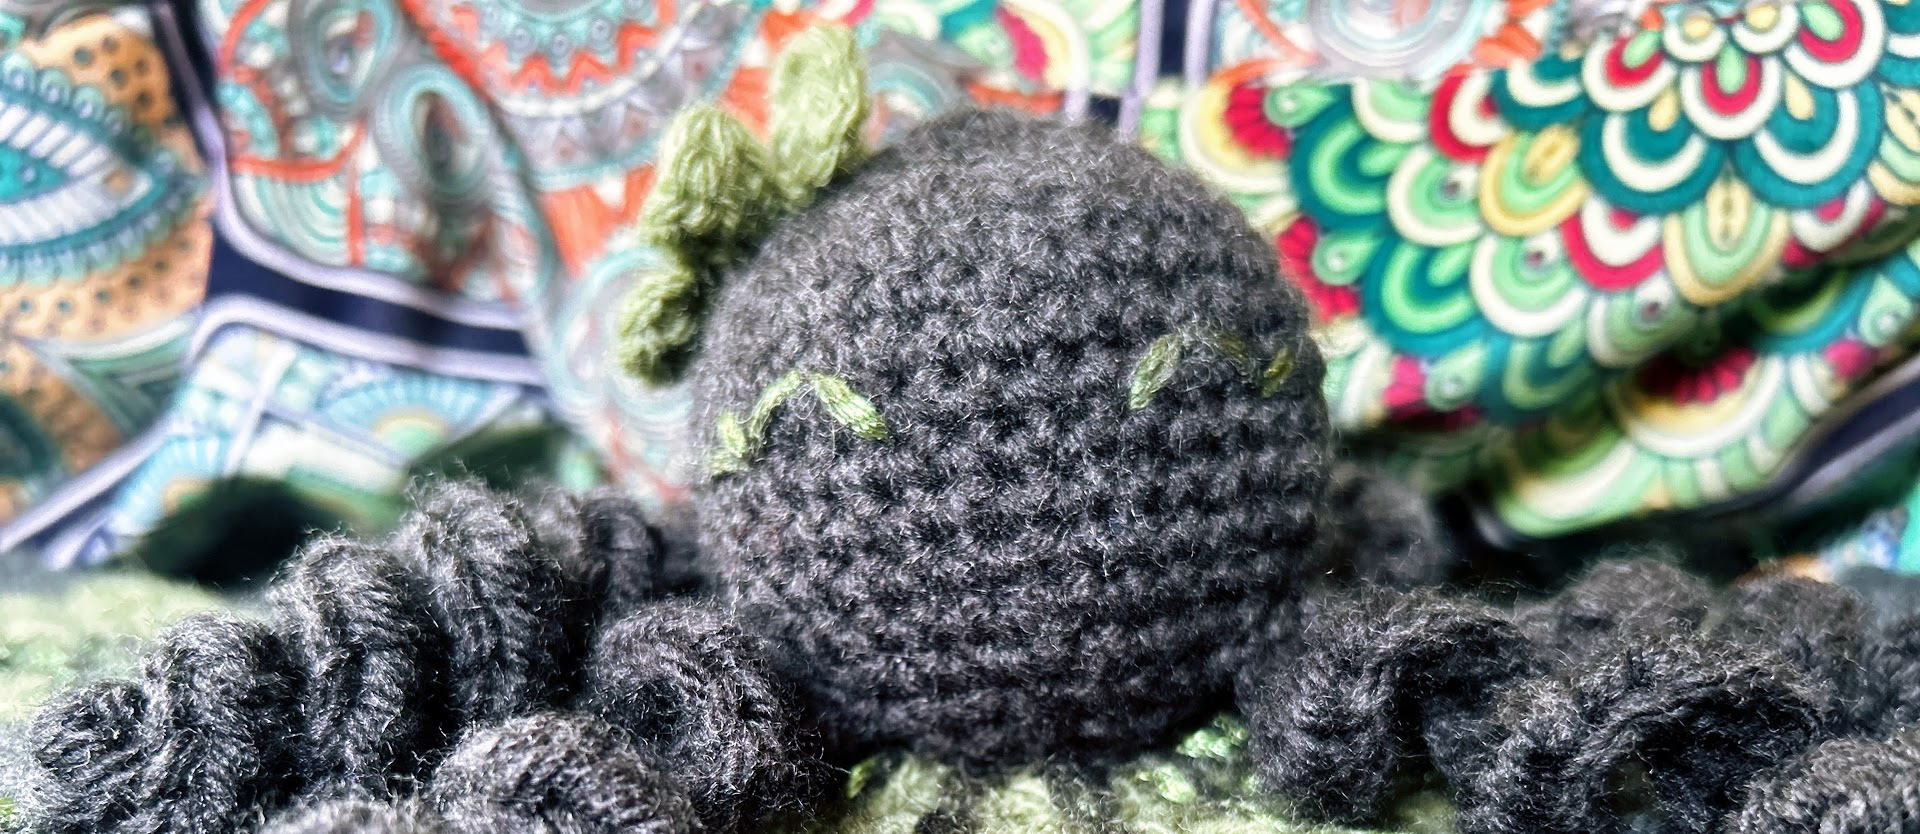
I first came across the free Spider on a Web Lovey pattern years ago and thought it was adorable in pink and purple. But for my own aesthetic, I decided to go darker and visualized a more elegant, ladylike spider — I made my version in charcoal, added a small green flower fascinator and glammy eyes, and named her Viola Spider. She now lives with her “web” draped over my basket of Premier Minikins yarn.
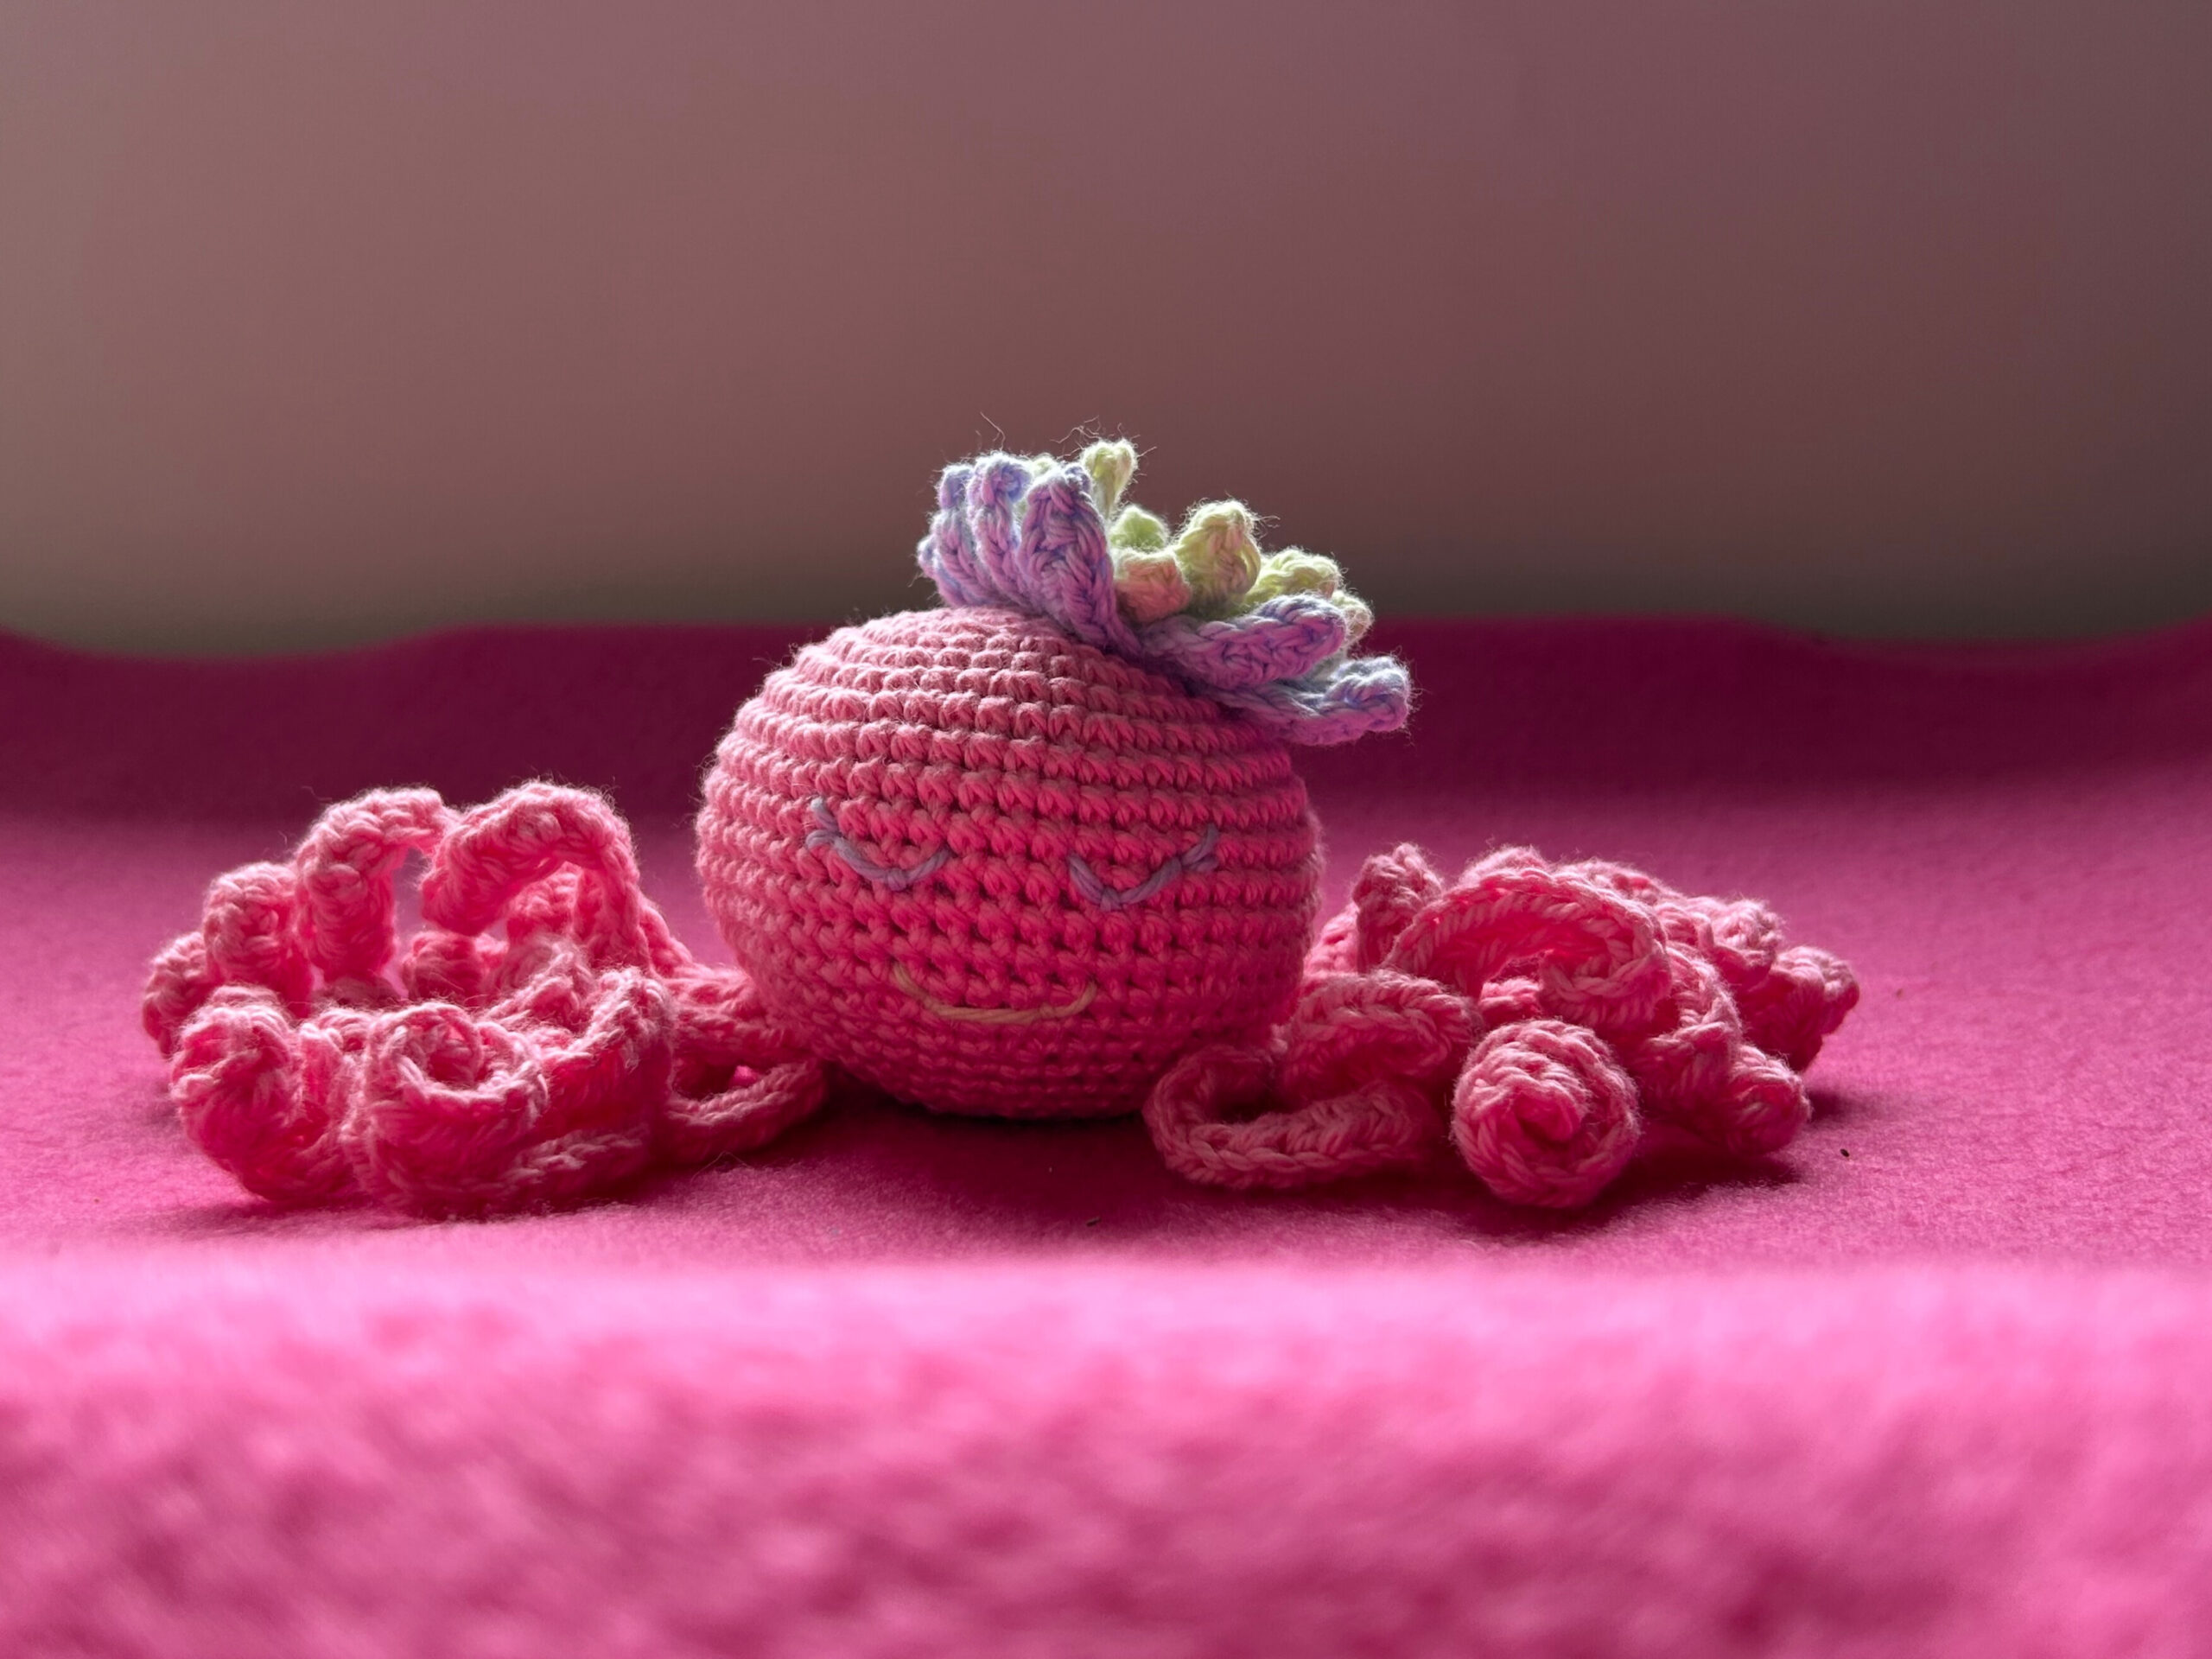
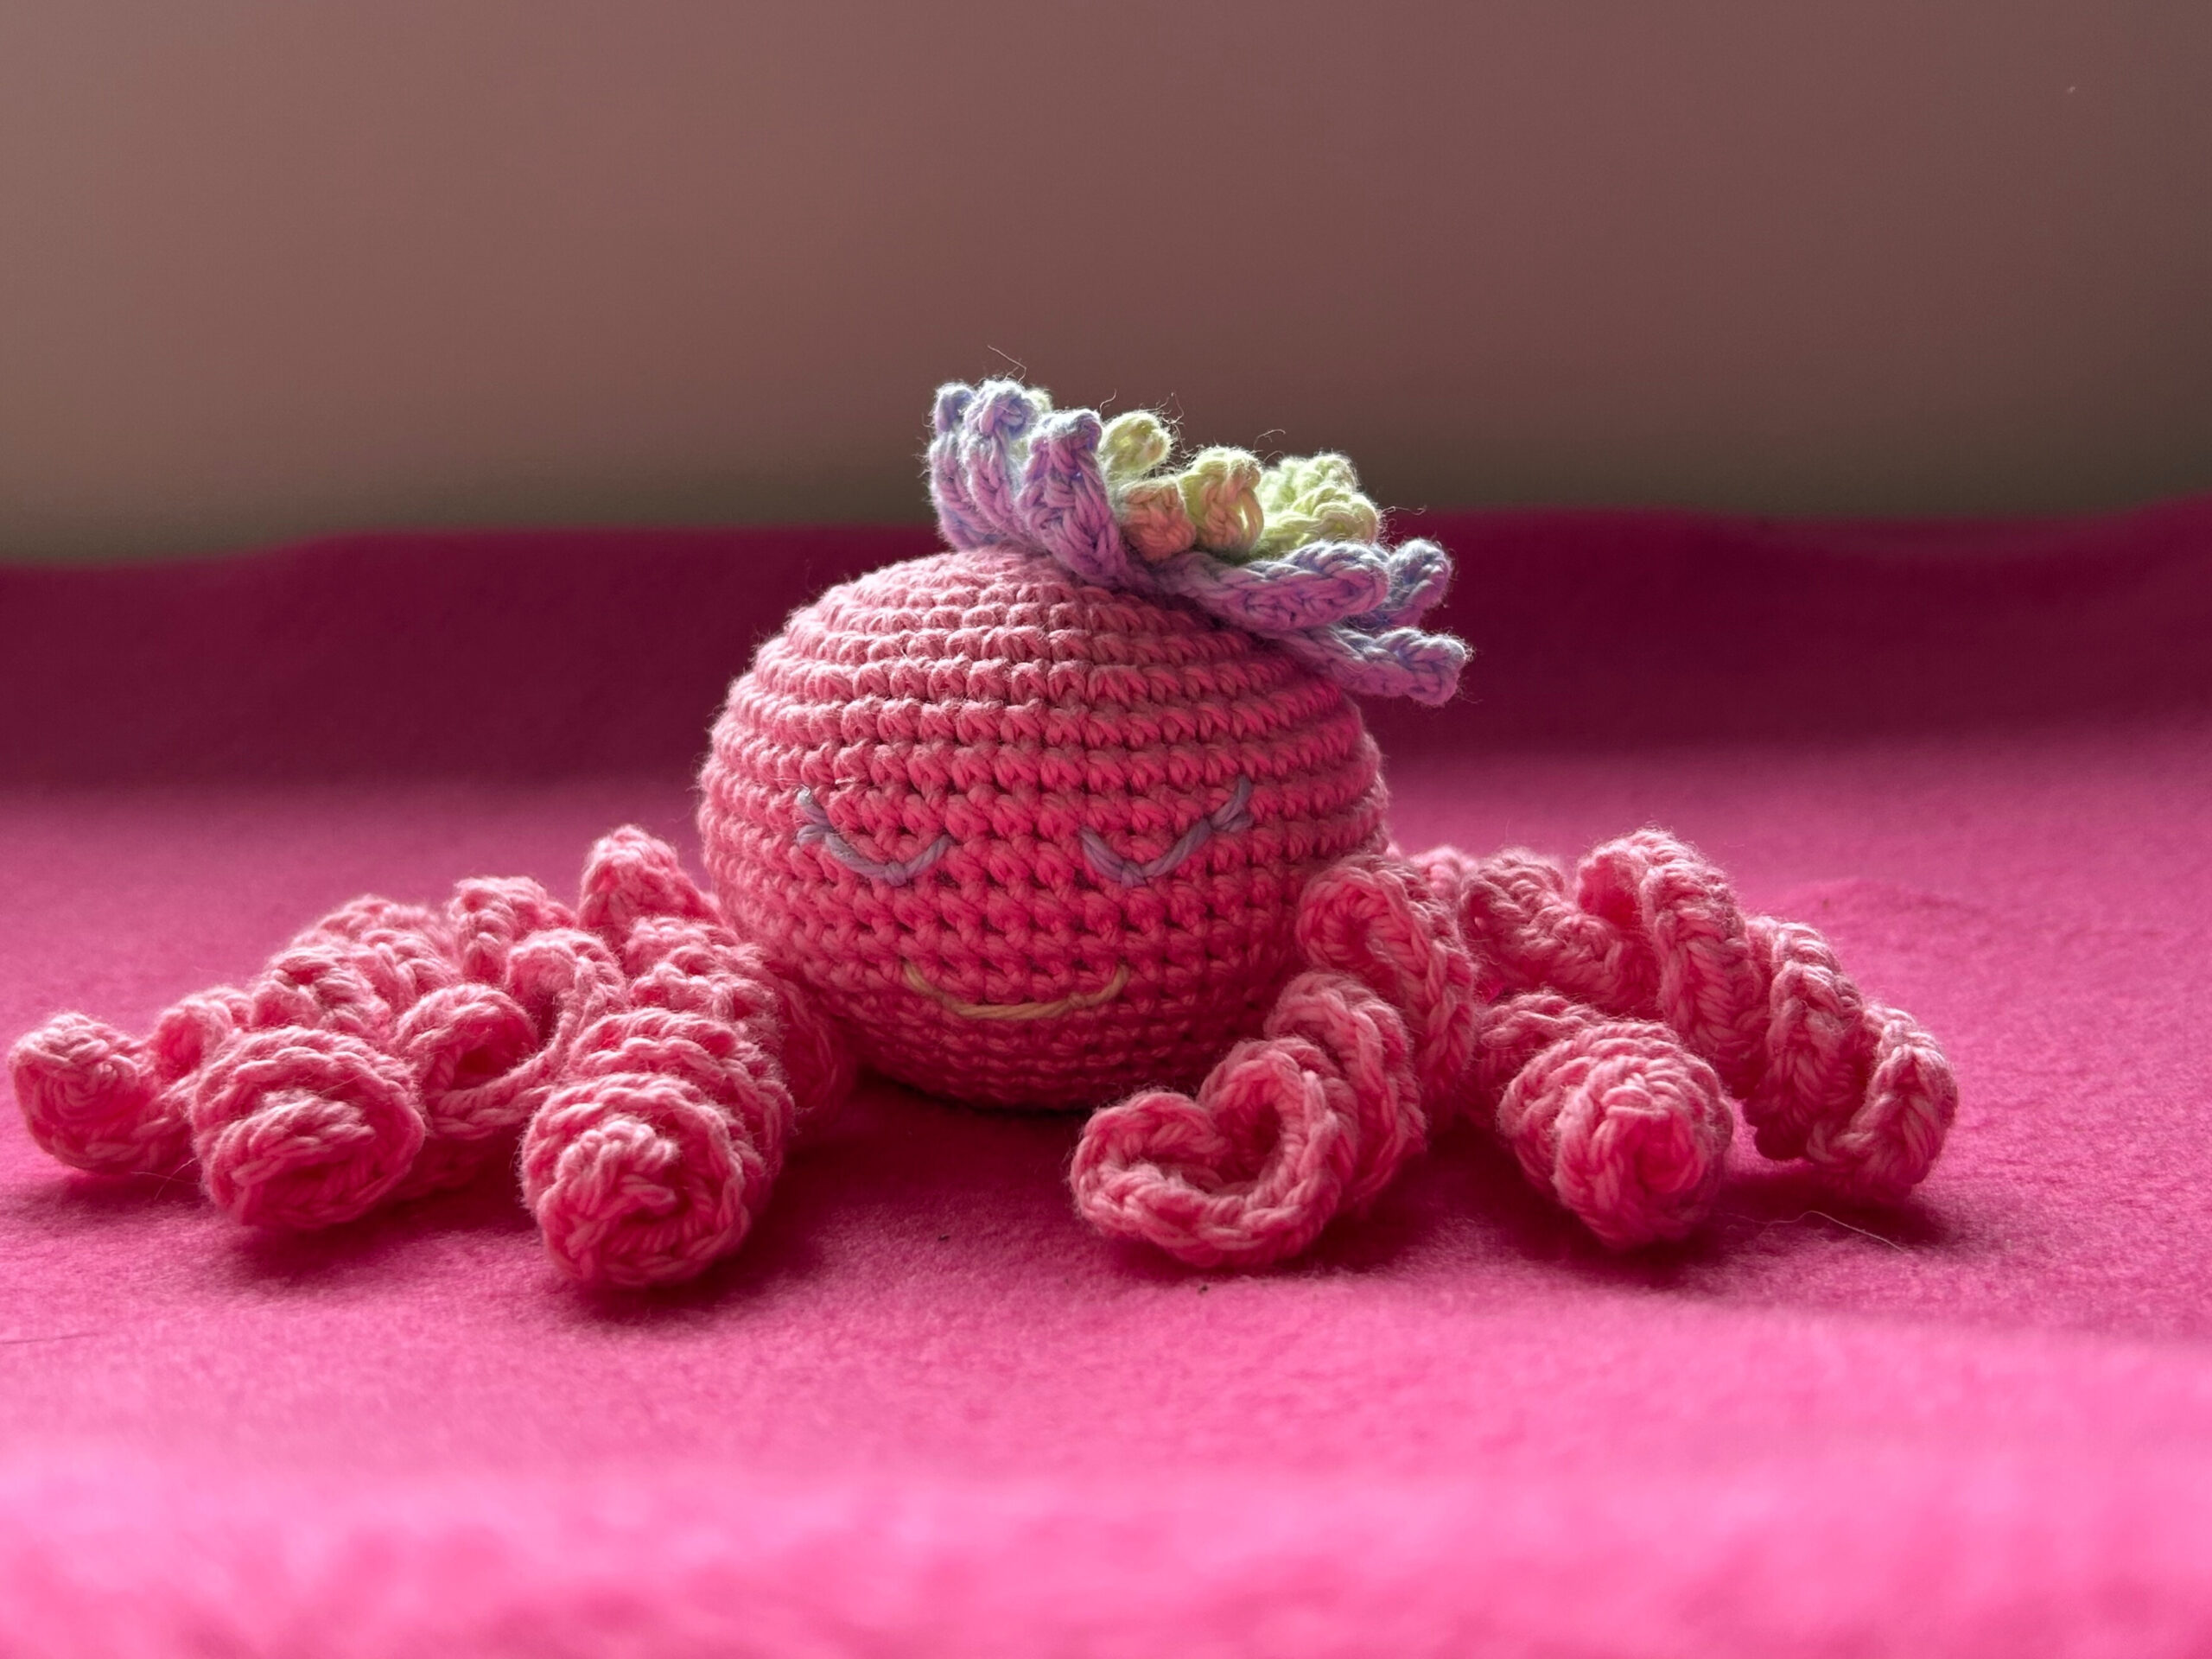
When I heard a friend was expecting a granddaughter, I returned to that same pattern. I already had those skeins of Meadow Yarns cotton out from my mushroom pouch project, so I used it to crochet a soft pink version — this time without the webbed blanket base — and since I can’t leave a plushie unadorned, she got her own six-petal flower hat sewn securely on. She became the perfect handmade gift for a newborn.
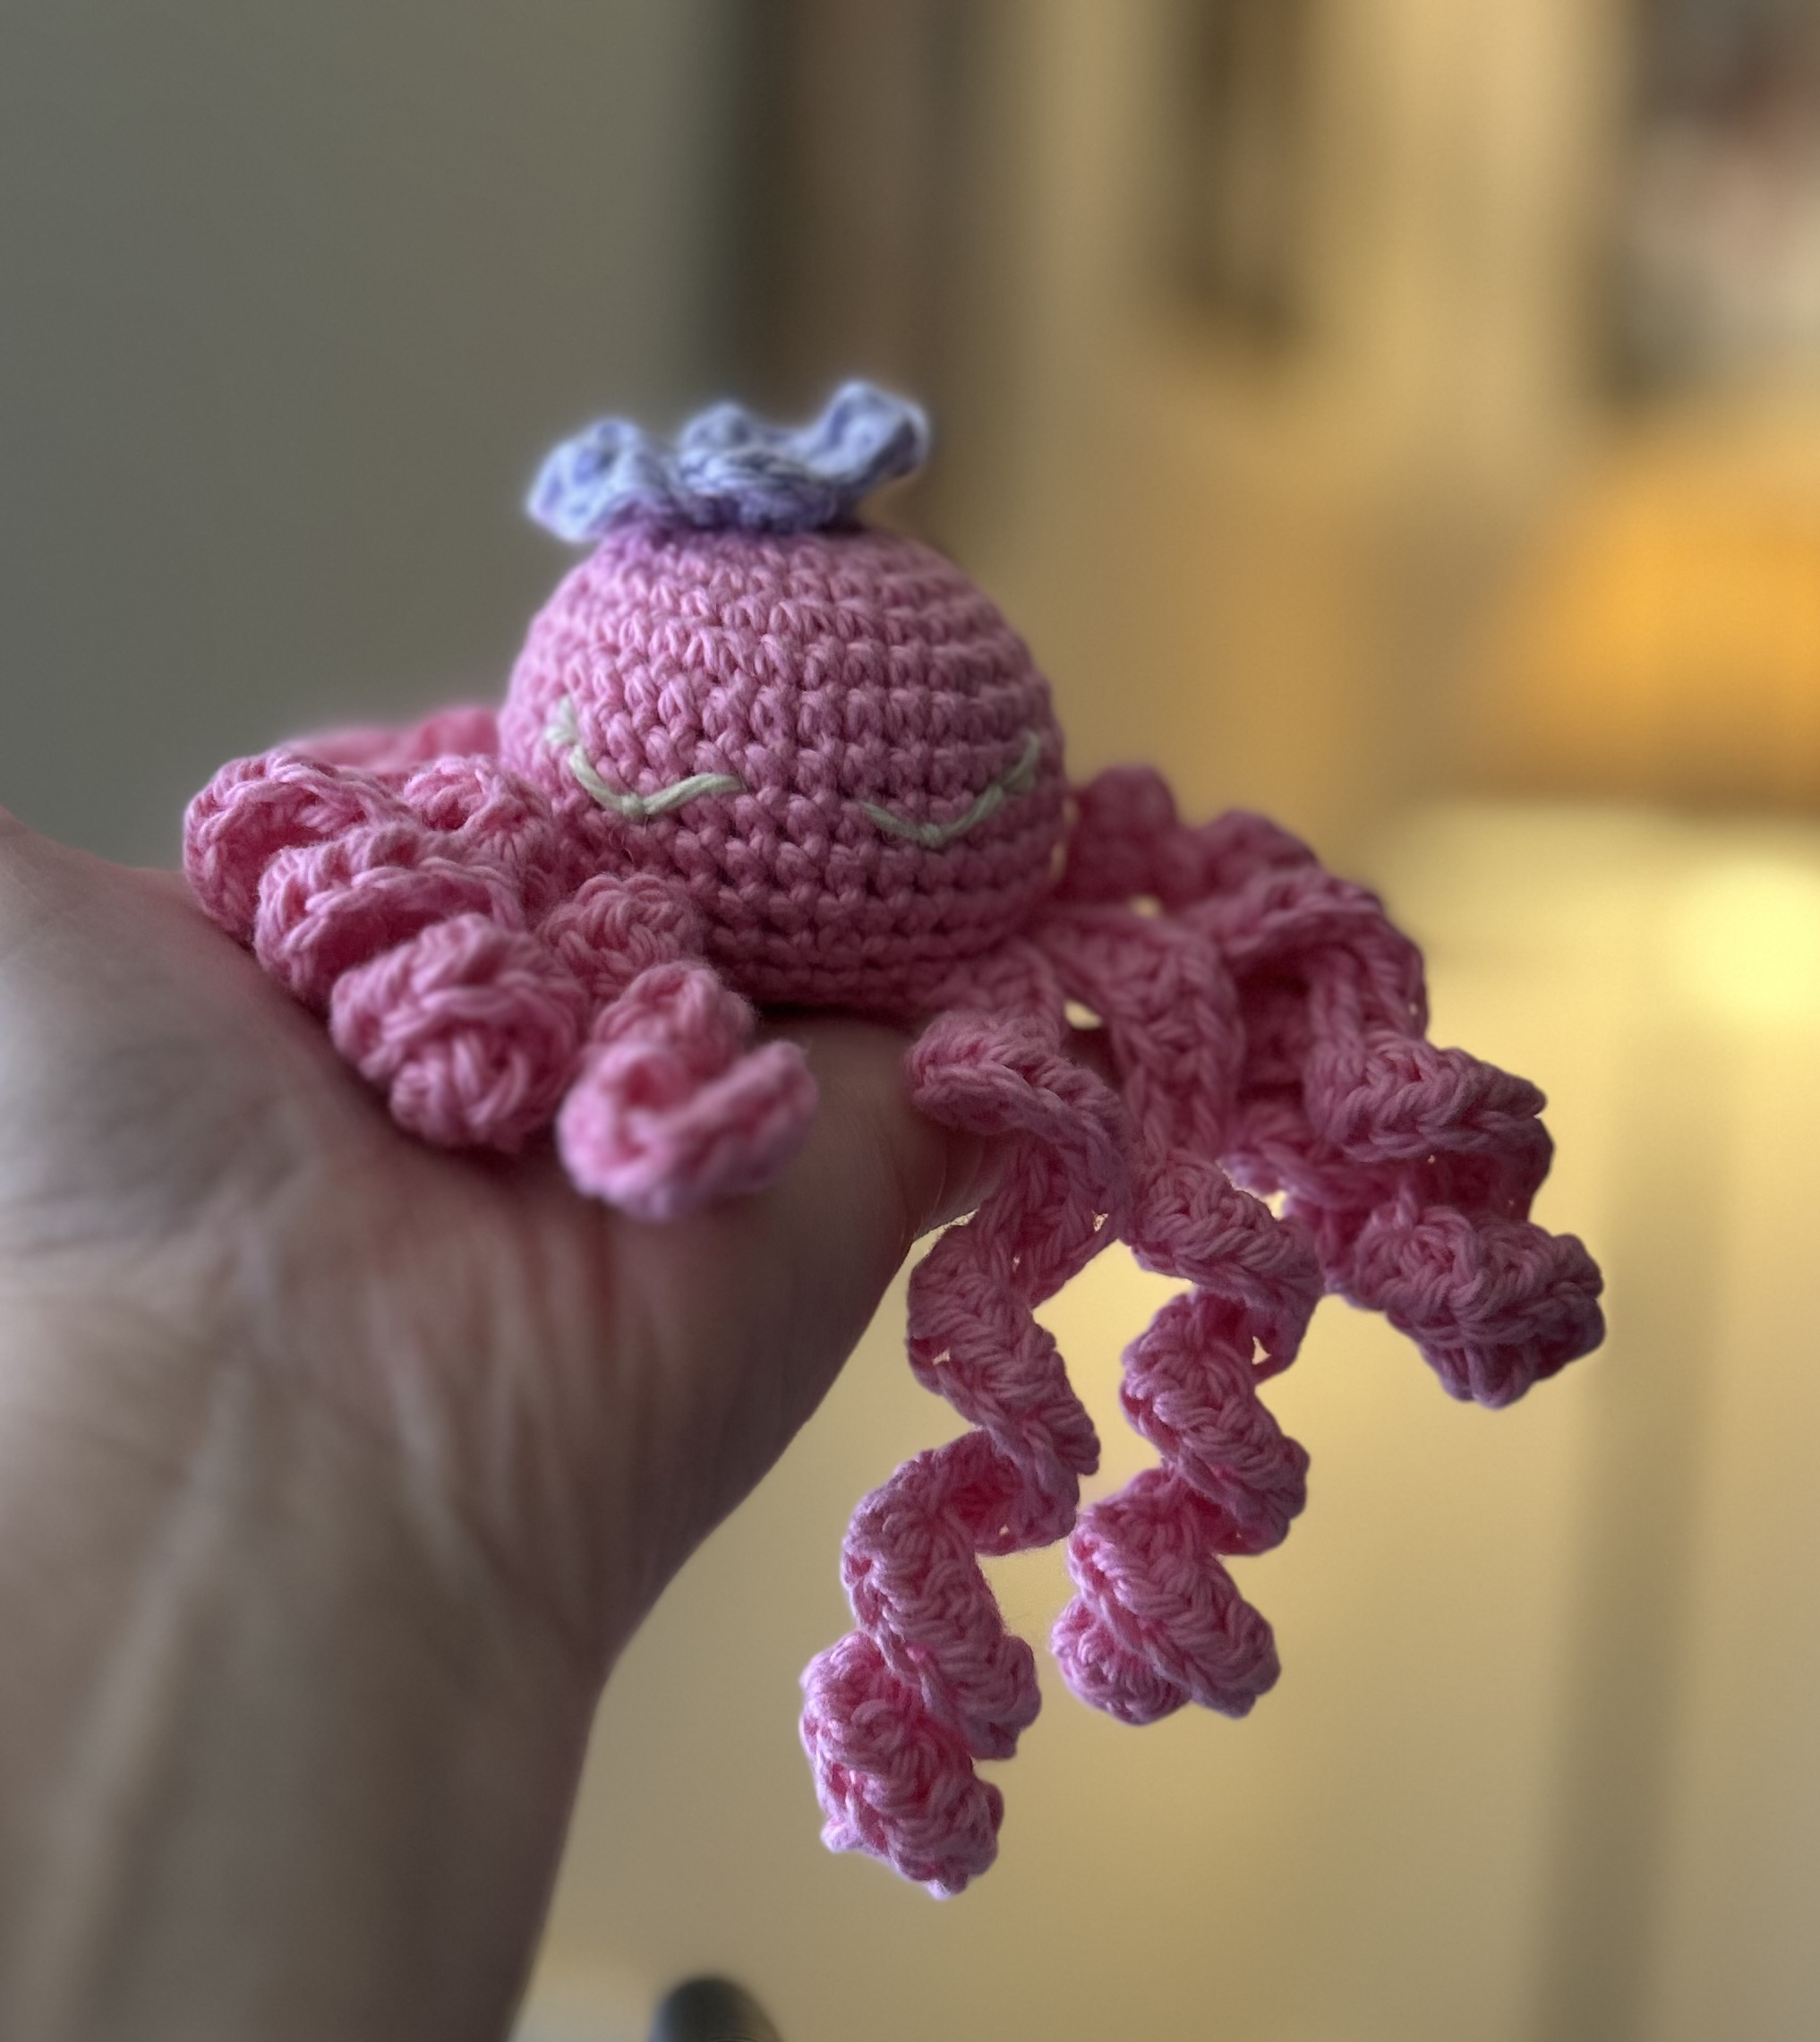
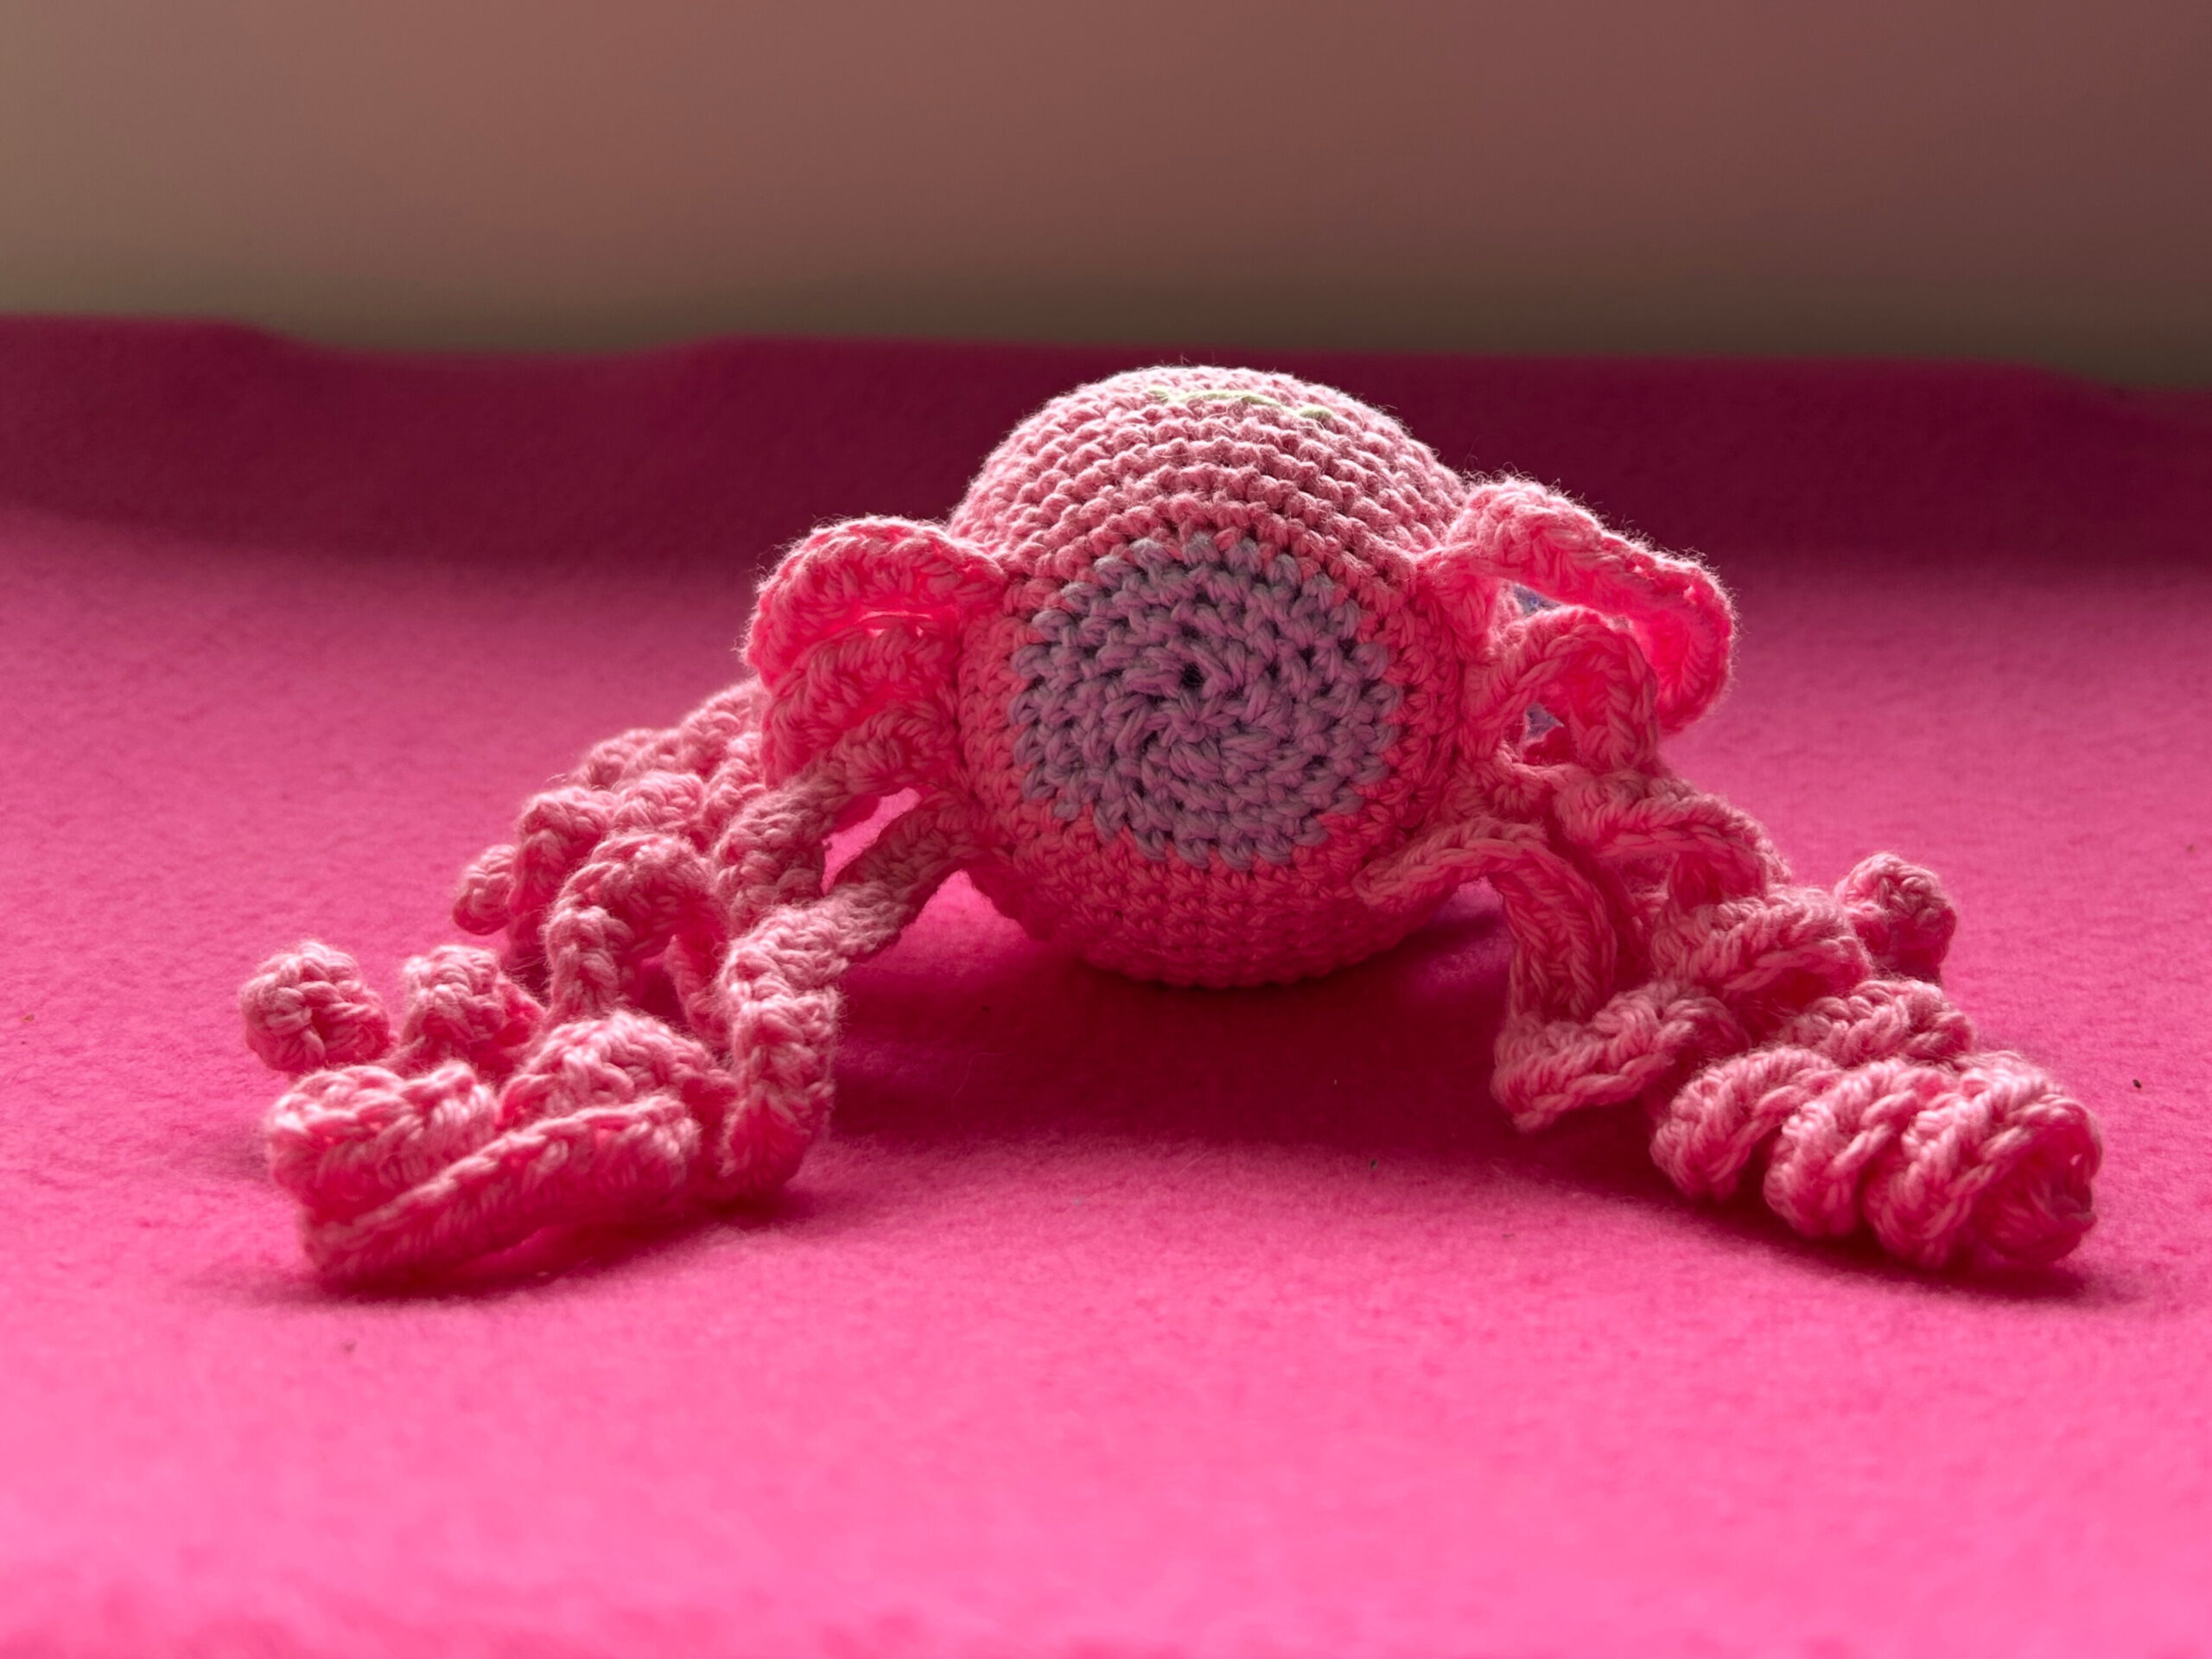
Another friend saw it and requested a slightly larger one for a toddler, in the same color scheme if I had enough yarn. These crochet project notes are about how I adapted the original lovey spider pattern into a toddler-size octopus plushie — complete with eight corkscrew legs, a flower crown, and a color shift when I ran low on pink yarn. The result: the Purple-Bottomed Daisypus.
Materials & Yarn /Crochet Project Notes
- Yarn: I used Willow Yarns Meadow 100% cotton – this is a great project for small/scrap amounts of yarn
- Main color: Lady Slipper (approx. ½ skein)
- Accent colors: scraps of Tidepool, Thistle, and Succulent
- This was yarn I had on hand from a previous project; a worsted weight cotton, which is nice for babies because it’s absorbent and doesn’t felt up or get fuzzy if they teethe on it, and it’s easy to wash. But use any amigurumi appropriate yarn you like.
A worsted weight acrylic would be fine, or try chenille for a larger, but perhaps less durable plushie. Use a hook that gives you a good tight gauge for amigurumi; maybe a 3.5 mm for the acrylic or 4.5 for the chenille.
- I haven’t tested this pattern in chenille because I personally don’t enjoy working with it, but I imagine the result would be very soft and squishy.
- Stuffing: I’ve used Poly-fil Polyester Fiber Fill for decades. I don’t know if there’s better for cheaper. It’s what I like.
- Face Details: Embroidered
- I skipped safety eyes to keep the toy toddler-friendly and plastic-free.
To make this toy larger and rounder than the original spider in the Spider on a Web Lovey pattern, I adjusted the body shaping by continuing to increase past the pattern’s original stopping point. In the original, the body stops increasing after round 6, reaching 36 stitches around. For my version, I expanded the body with the following changes:
- Round 7: (5 SC, inc) ×6 → 48 stitches
- Round 8: (11 SC, inc) ×4 → 52 stitches
- Rounds 9–13: SC around (52 stitches each round)
- Round 14: (11 SC, dec) ×4 → 48 stitches
- Round 15: (5 SC, dec) ×6 → 36 stitches
For the legs, I followed the method used in Round 13 of the original pattern, but worked mine in Round 16 (which has 36 stitches instead of 30). This gave a little more spacing between each set of four legs. I kind of eyeballed that part, making it as even as possible. I also made the legs longer — 30 chains instead of 25 — so they would be more proportional.
- Round 16: Create 8 legs as in original pattern, spaced in two groups of four, on roughly opposite sides of the body. I started my first four legs at the beginning of the round and went from there.
After completing the leg round, I resumed decreasing to shape the underside of the body. I like to start lightly stuffing the body around Round 18 so I can still reach in and adjust it as I go. The closing rounds look like this:
- Round 17: (4 SC, dec) ×6 → 30 stitches (this is where I ran out of pink and switched to thistle)
- Round 18: (3 SC, dec) ×6 → 24 stitches — start adding stuffing
- Round 19: (2 SC, dec) ×6 → 18 stitches
- Round 20: (1 SC, dec) ×6 → 12 stitches
- Round 21: Dec ×6 → 6 stitches
Finish off, close the hole, and weave in the end. This modified shaping makes the body noticeably wider and taller than the original spider, which helped transition the character from a lightweight toy ideal for baby fingers to an octopus friend easily carried around and hugged by a very small child.
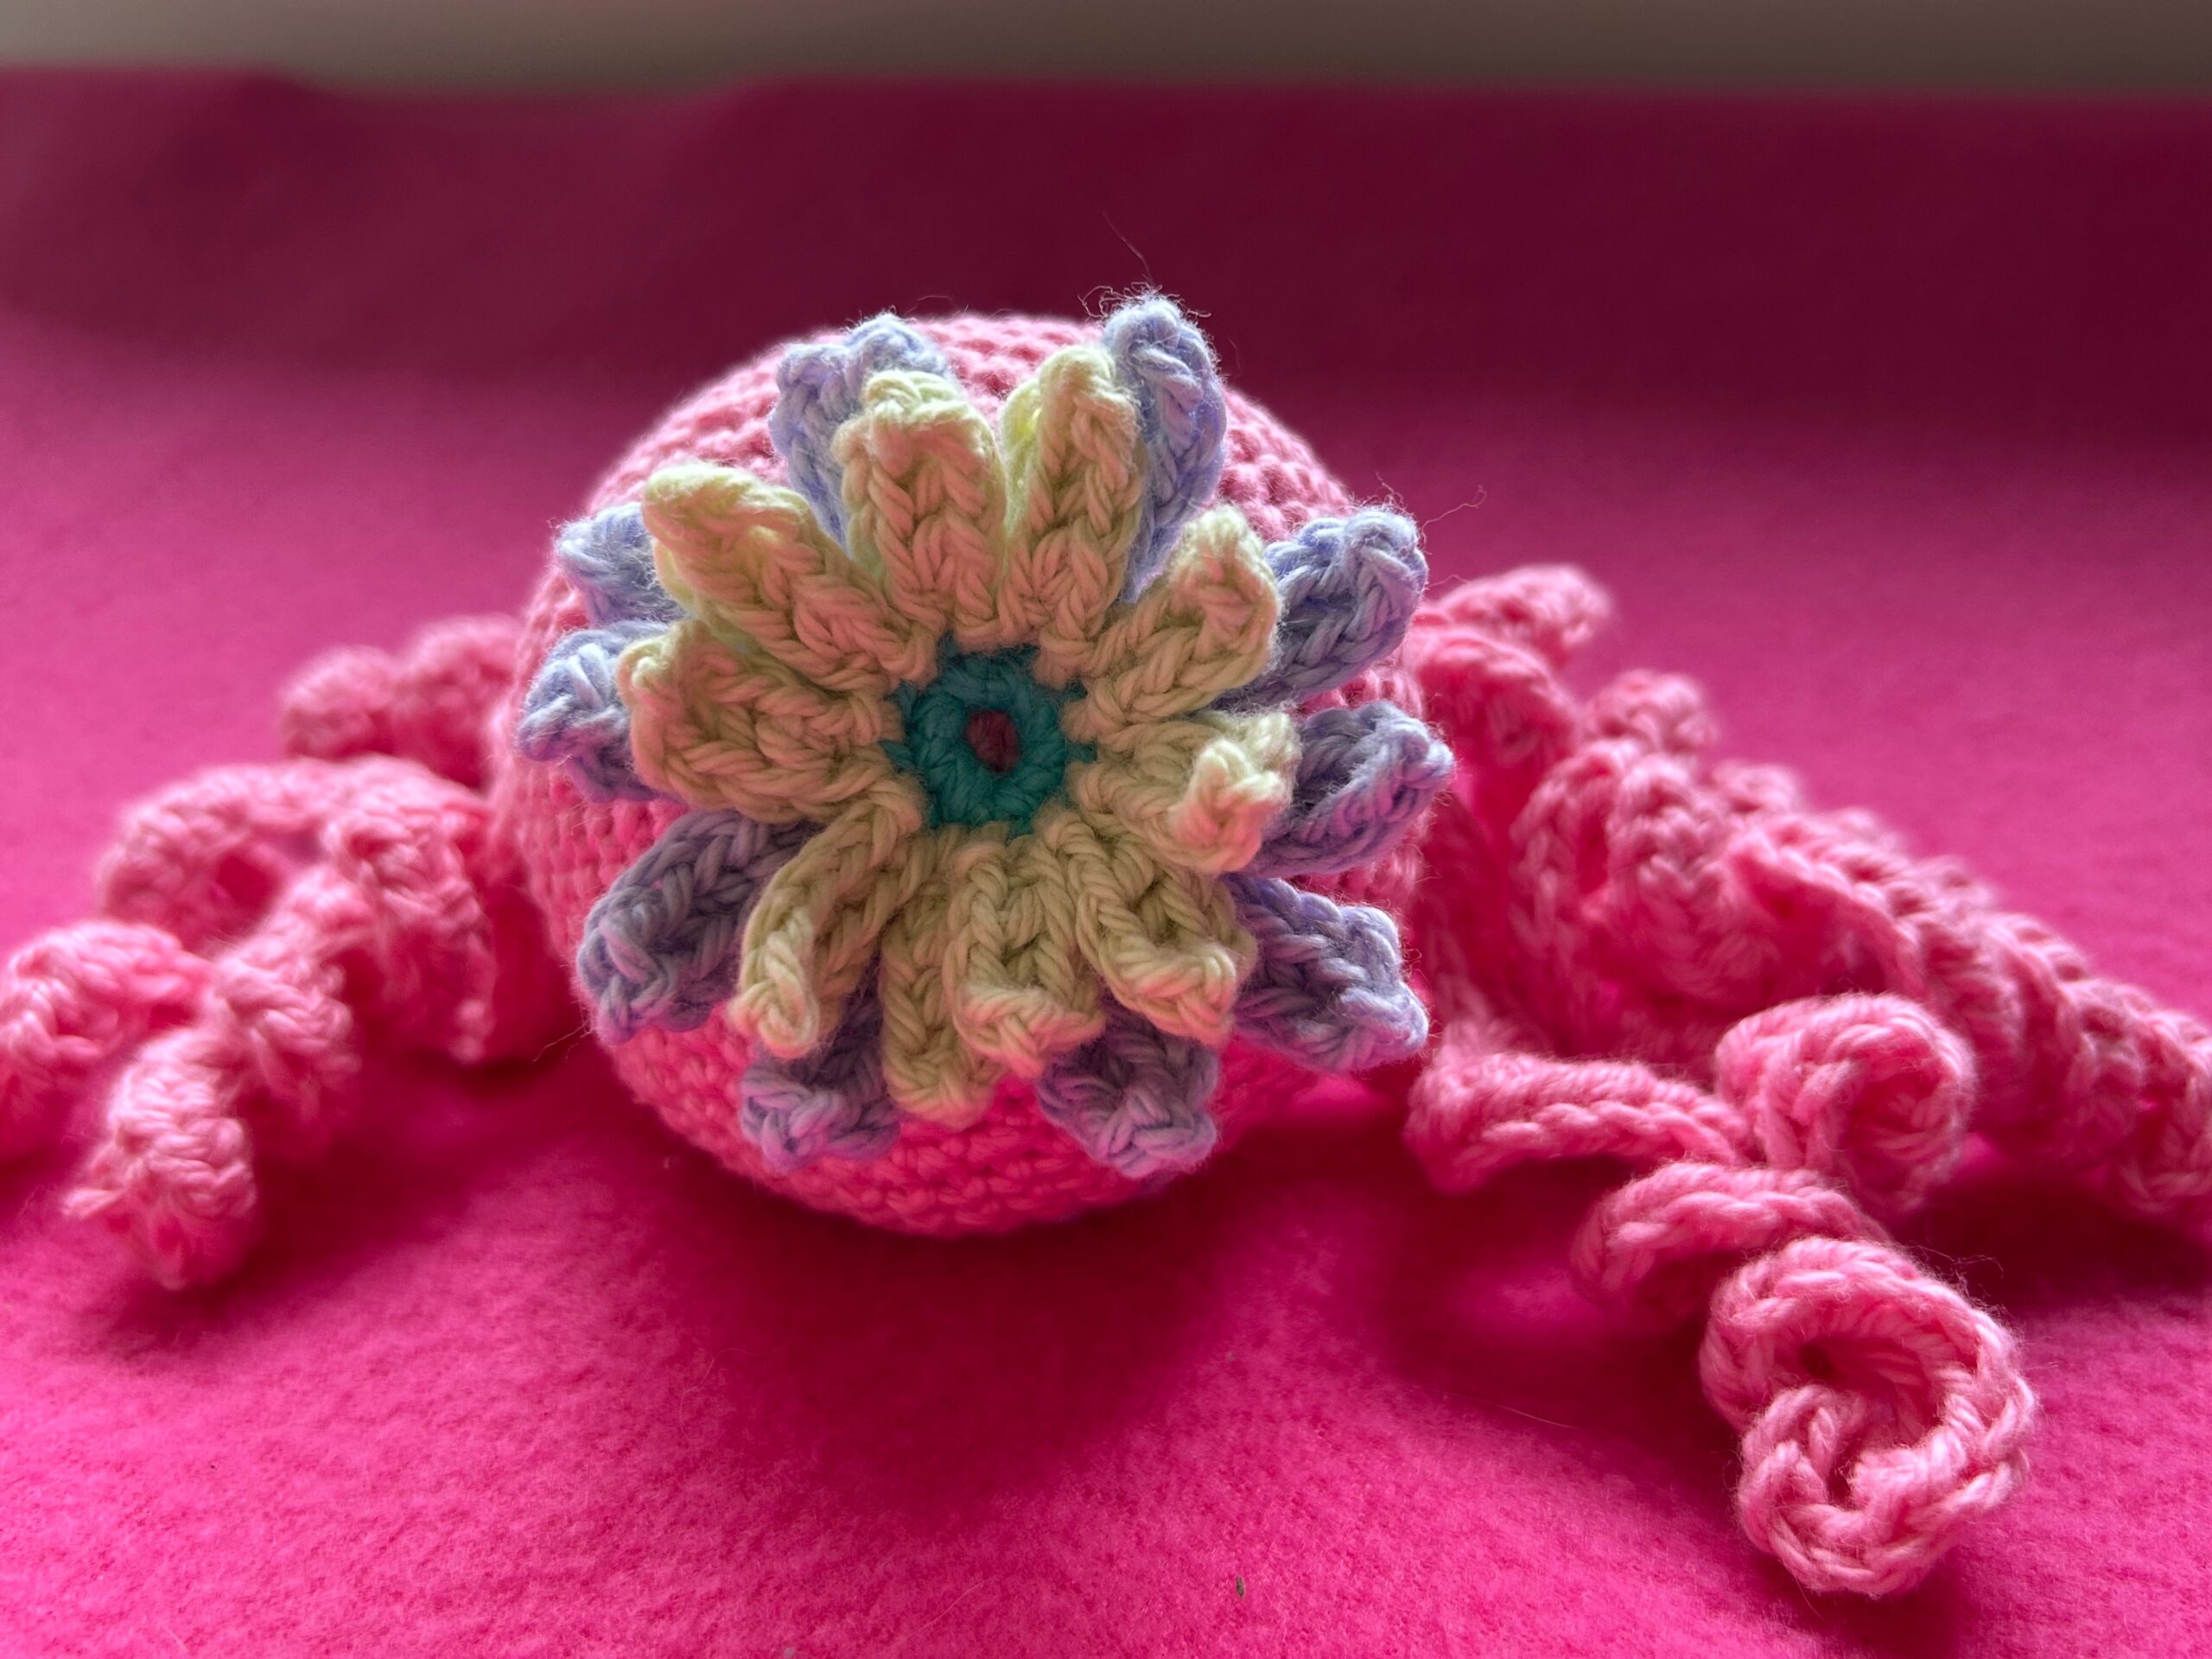
For the flower, I followed the free Gerbera Crochet Flowers pattern exactly, using three colors of yarn I had on hand: tidepool for the center, succulent for the front petals, and thistle for the back petals. I chose tidepool for the center, which is the smallest element — I’m honestly mining my brain looking for literally any other way to explain that it adds a “pop of color” because that expression feels like such a modern cliche, but maybe it’s a cliche for a reason. I’m suffering a momentary lack of creativity; please comment below with a more creative way to say that!
Sorry. Mask back on, back to professional voice.
When assembling the flower, I left long yarn ends on all three colors for sewing it securely onto the toy’s head. I started by using the tidepool end to sew on the flower’s center, stitch by stitch, all the way around (so about six stitches). After sewing on that layer, I gently pulled the flower to check that it was secure and neat all the way around, without pulling the yarn too tight.
Once the flower center was firmly attached, I ran the excess yarn ends of the tidepool color through the body to hide and secure them. I then did the same with both ends of the succulent color. I then used the thistle colored yarn from the back petals to once again stitch around and fasten the petals neatly to the head. This step can vary depending on your specific toy — use your judgment to decide what looks neat and feels secure. The goal is a clean finish with yarn sewn down firmly enough so nothing can be pulled off and fingers can’t get caught, but without over-tight sewing, which raises the risk of the yarn breaking with rough play.
All that’s left is her face! If you’d like to learn my favorite crochet tip and see some project notes about how I decided on her expression and how I embroider faces on my handmade toys, check out my next blog post: Crochet Tip: Fix Those Wonky Faces.
fastsuzy@pm.me